


Hey everyone! I'm here to finish the Nuno felted scarf!
(Before I get started, I just want ya'll to know that the scarf I have been working on was a kit by Pat Reisenburger of Aussie Threads & Fibers.com. She's the amazing master of my creative universe right now! (I'm not worthy! I'm not worthy!) You can see her projects and crazy thoughts at: www.thecraftyretailer.blogspot.com.)
Learning a new media (for me) is not always intuitive. I ALWAYS need new ideas spoon fed to me to understand the process. (I guess I'm a visual learner.) Since there isn't anyone who Nuno felts in Casper, and seeing as how Wyoming can be a barren wasteland of creativity, I had to teach myself. So, here I am!
This kit was a two part process...for me. Mostly because I have kids. NOTHING is simple with kids!!
The project required a time commitment and......the lethargically-challenged need to stop reading now and immediately turn on the TV........I had to split that time into parts. I think I spent a total of 15 hours on this project over 4 or 5 days.
Before today, I had already spent time the month before felting the ribbons that get embellished to the top of the scarf. Now, I'm ready to finish felting the edging of the scarf and felt the ribbons to the surface of the scarf.
 I laid out my project to arrange and begin "shingling" it. Shingling prepares it for the "jelly roll," which is the precursor to NUNO FELTING! Or, as Linda would say "a shit load of rolling back and forth." Entirely, too much for her, I might add.
(Okay, and something else. If you all are lucky enough to have an awesome friend with lots of extra room that you can totally dowse with water - take advantage of her and say thank you!)
 You can see how I rolled back the ribbon and shingled underneath it. You will shingle wool wherever you want to "stick" together two pieces of silk, or "hem" an edge. The wool fibers will mesh together and bond to the silk. Cool, huh?!
 And in the picture to the right,
I have laid out and shingled the
entire scarf.
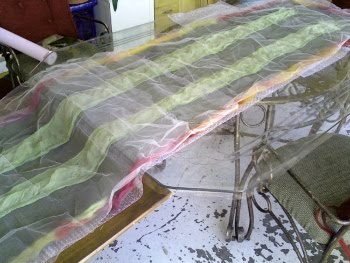 After you shingle, you cover the entire project with mesh. The mesh prevents things from sticking together that shouldn't.
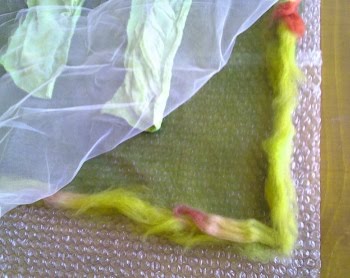 The entire project was laid out on bubble wrap, its shingled, then its covered with mesh.
 After all is covered with mesh, you pour soapy hot water over all the "shingled" wool. You can vaguely see in the pic to the left the lines of soapy hot water that cover all the stuff that's getting felted. You don't have to dowse the entire scarf!
Just wet the areas you have shingled with wool.
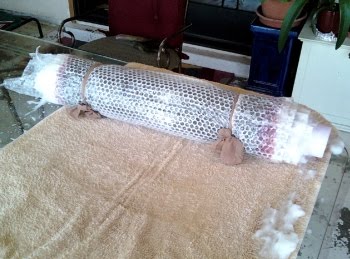 You roll the entire thing up and tie the ends with pantyhose. Like this! Looks like a jelly roll,don't it?!! I have it sitting on top of an old towel, because now I start the rolling back and forth process, and as you roll water squishes out. So, you roll, and roll, and roll.....and roll. Actually, it's not that much. I rolled on and off for about 15 to 20 minutes.
 Minus a few small steps, you end up putting the entire project into a bag for the "fulling" process. Fulling is what puts the felting process into overdrive. You do this to make sure the felting is fully "cemented" and starts to pucker the silk. Puckering is good. Puckering is what gives your project natural ruffles and adds waviness to the fabric.
Fulling is the fun part. You must wad the project into a ball and throw it against the table and knead it like dough many times. It's aggression therapy! If you don't mind soaking everything around
you, you can full without the bag. I use the bag.
You let it all dry.


Then you sew on trimmings, beads, crystals, etc. with whatever your heart desires!
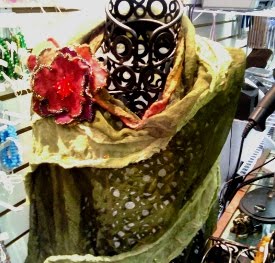 And here's my finished project! Cool, huh?! I'm hooked.
I finished mine off with sequins down the light green ribbons, and I fringed the edges with seed beads and crystals. It's sparkly. Yes, it's simple. One must begin somewhere. I hope to dazzle you soon with my next project!