

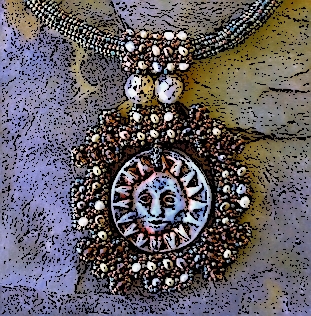
"Round Squared"
A Right Angle
Weave Pendant
How-To
This post is a how-to on a right angle weave ("RAW") surrounded disc to create a pendant piece for a necklace. I will not be teaching RAW in this post ~ just how to use RAW to create a focal piece. You can find some great RAW how-to's on the Internet and I encourage you to do so if you do not know RAW. Otherwise, you will not get through this project!
For this particular pendant, all I am doing is surrounding a round disc with a square box. I will show you the basic structure - it's up to you to finish it!
If you do, I'd love to see the finished project. I'll even post your finished photos on my blog. So send me a photograph and your experience and I'll get it up!
Materials:
35-38 mm round disc (in any material)
11/0 rocaille seed beads
15/0 rocaille seed beads in 2 colors
(optional 1 15/0 rocaille, 1 15/0 hex cut)
Fireline .006mm in crystal or black
13/0 beading needle
Scissors (sharp ones!!)
Bead Pad
50 - 4mm Czech glass fire polish rounds
1 strand - 4-5mm Freshwater pearls
(or something else in whatever material that has a nice contrast to your work)
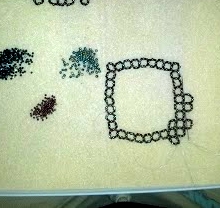
 1. You will build a basic RAW structure by stringing the following beads to create your RAW "boxes."
15/0 rocaille
15/0 hex
11/0 rocaille
15/0 hex
15/0 rocaille
2. You will re-create this pattern for each side of the RAW box.
3. Now, you will create a row of 9 boxes.

4. Connect to your first row of 9 boxes, a 2nd row of 9 boxes.
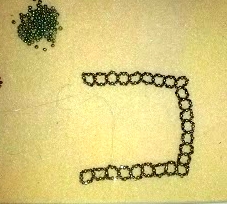
6. Now create your final row of 9 boxes to create a square.
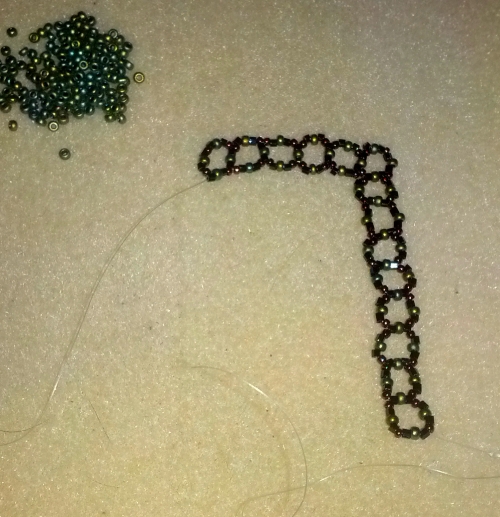
THE TRICK: There is a trick to attach row 4 to row 1. After box 7, string your beads for the first side of box 8. Pass your needle through the closest side on box 9. You can see in my picture the beads strung and my needle sticking out of the closest row - see that?

7. After you pass your needle through this row, pick up your next side of beads and finish the box. Tighten it up, pass your needle back through several areas, create a knot, pass your needle through a few more areas, create a knot, cut off your thread.
It sounded like I was repeating myself? I was! You can never be too careful with knotting off your Fireline and cutting off. I knot in several places before doing so to ensure my work will not fall apart later. Take heed!
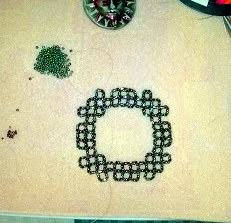
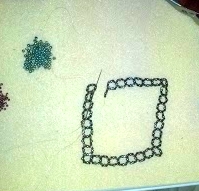
8. You are now going to begin the side embellishments on your box. Pass you needle and add boxes where you see them in my finished box in the photograph to the right.
As you can see from the left photo, I added one box on the inside of the square and several along the outside of the square.

9. Here's a closeup of the finish box with embellishments. I put my disc in the center to be sure it would fit. Cute, huh?
Make sure you knot off in several places and cut off your Fireline.
10. Now you need to re-create this box as you see it all over again. We are going to layer the two together when we're done and you need two identical layers to do this. So get busy!
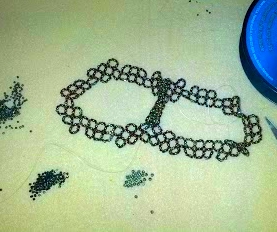
11. As you can see here, I have the two layers spread apart like a butterfly so you can see more completely what I'm in the process of doing. I'm zipping the two layers together with RAW along the side. You use the 11/0 rocaille, adding 11/0;s as you make RAW stitches along the edge.

You can't see the detail work here, but you can see how I hold the two pieces and am working the edges.
12. When you have all 4 sides sewn together, you can needle back to the front of one of the two sides (there is no top or bottom, just pick a side to make your front) and start crossing the tops of the boxes with your embellishment beads.
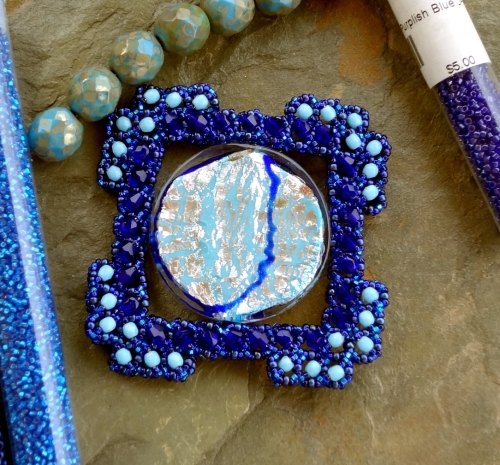
In this close-up you can see how I crossed over and embellished my boxes on this blue piece (which is in progress).
When you create crossovers, you are using this pattern:
15/0
4 mm Czech or 4-5mm Freshwater Pearl
15/0

Here is a close-up of the final on my brown piece. I used transparent dark topaz 4mm Czech glass and freshwater pearls.
On the blue piece, I used 4mm cobalt blue crystal bicones and 3mm Czech glass opaque turquoise fire polish rounds. You can use whatever you want! Just have fun with it!
Thanks for beading with me and I'll see you next time!!