Search This Blog

Friday, July 31, 2015

Waxed Linen Sea Glass Earrings


  I'm all about incorporating natural elements into my beading, so I thought I'd show you my version of waxed linen earrings. They make up fast and you don't need a lot of materials to get them done.
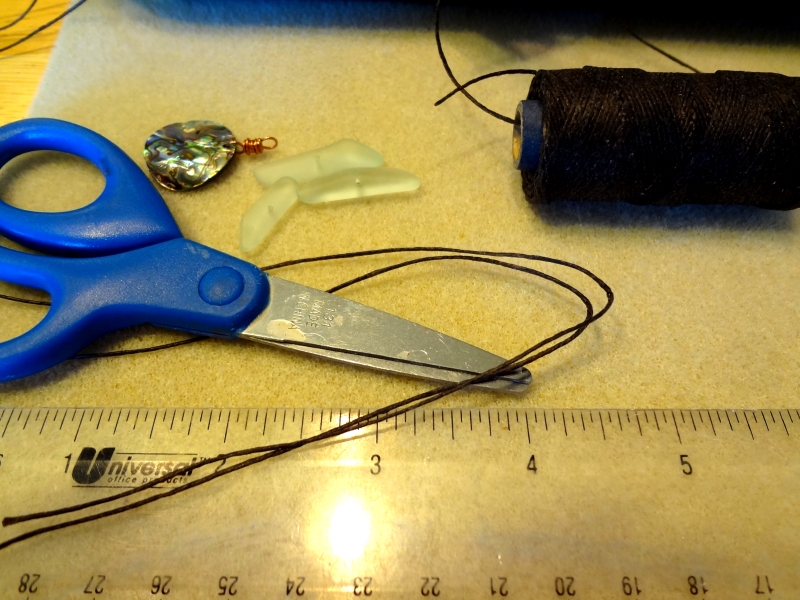

 
Tools/Materials:
  • Scissors
  • Ruler
  • Flat and Round Nose Pliers
  • Irish Waxed Linen
  • Flocked Beading Pad 
  • Beading Awl (optional)
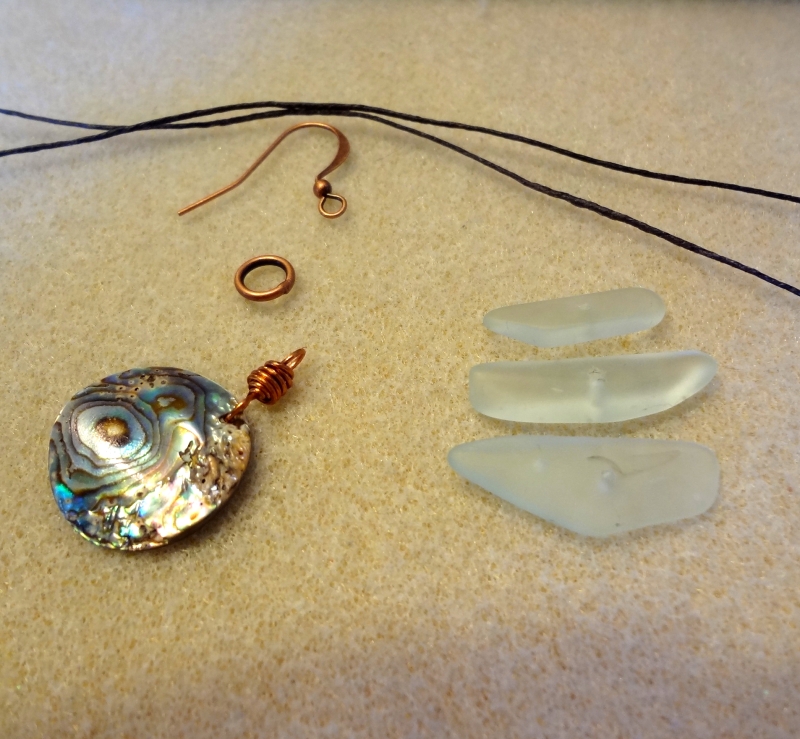


 Beads/Findings:
  • 2 feet of size 22g wire
  • 2 - French Ear wires
  • 2 - 5mm Closed Jump Rings
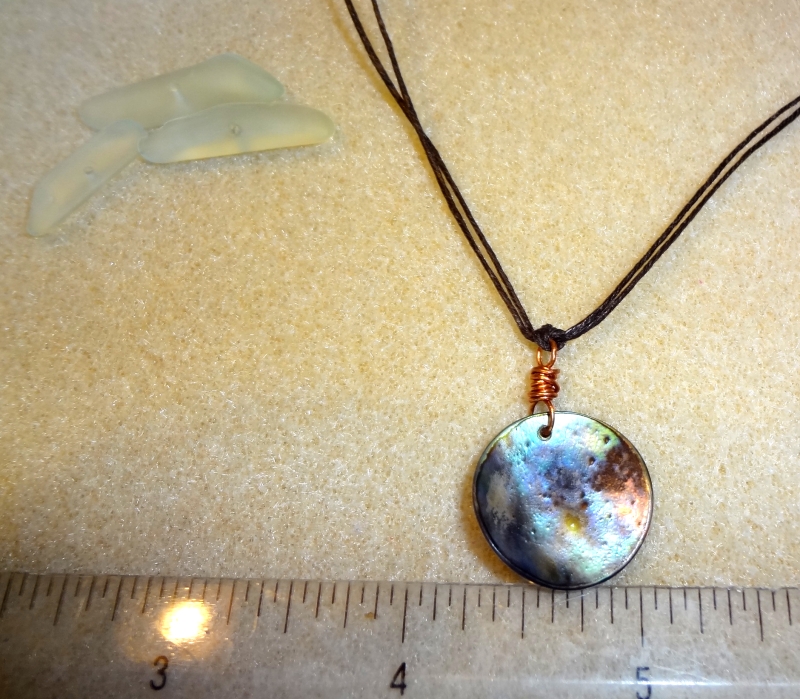
  • 2 - Abalone or shell drops
  • 6 - Sea Glass Fish Bones in staggered sizes


Okay, you've gathered your materials.  Yay!  Let's move on!


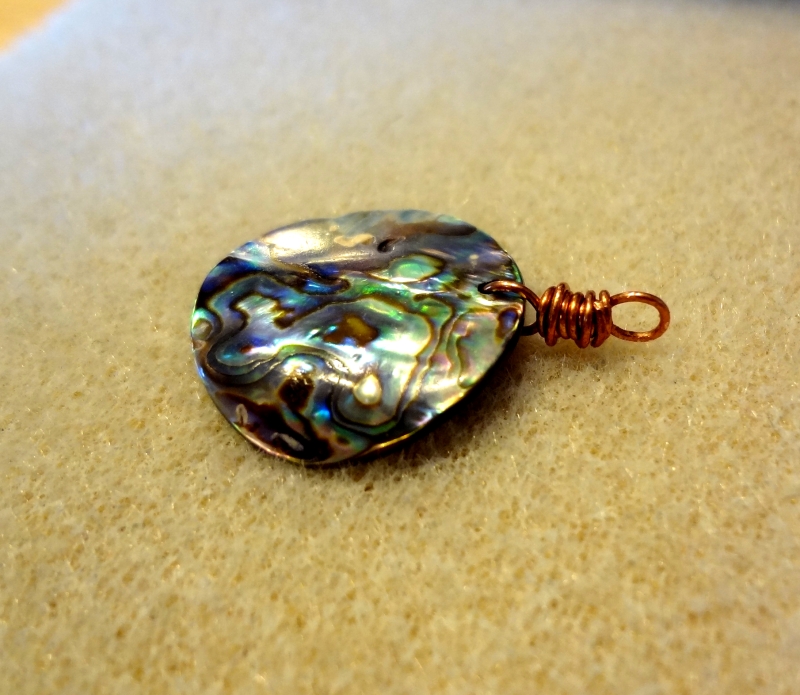
The first thing you need to do is create a double-sided wire loop onto your shell.  Mine is Abalone - you can use whatever you like!  Wire both pieces of shell so that your dangles are ready to add to the earrings.

I'm not going to cover the wire loop here.  You can find those directions in many places online or in the back of (my fav) Wirework Magazine.


Pull 2 strands of waxed linen 9 inches long each.


Fold the two pieces in half and pass them through that top loop of one of your shell pieces.


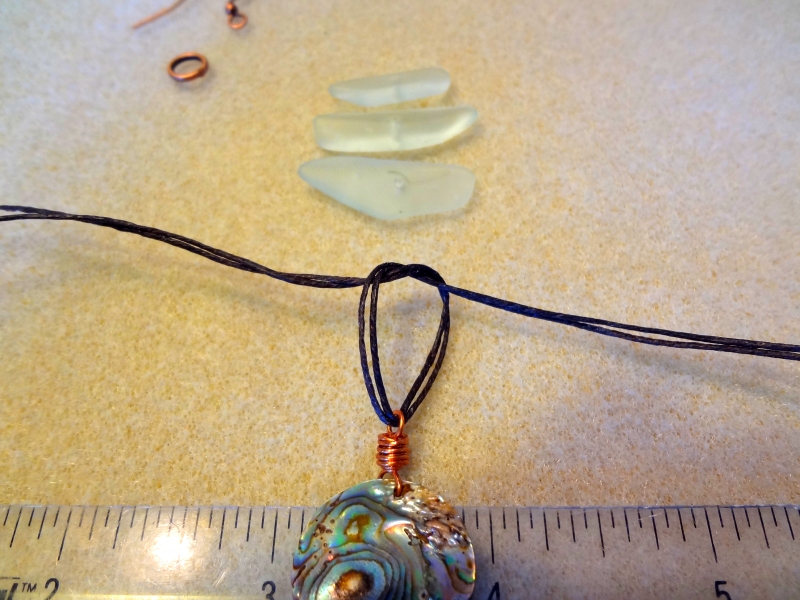
Tie an overhand knot (or as I like to refer to it "a shoelace knot") into the 4 strands over the top of the loop.  Split the strands 2 to a side and form the knot.


Tighten the knot down onto the wire loop.


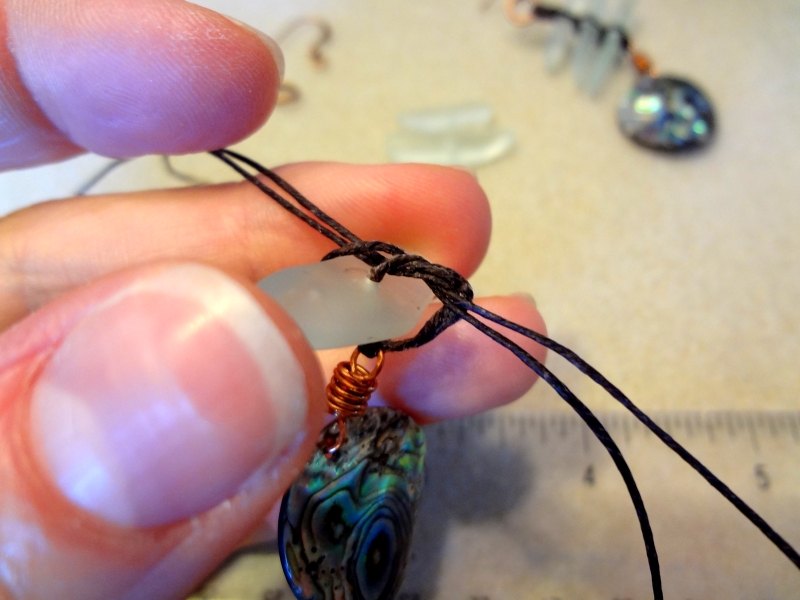
You're going to add the largest of your 3 pieces of fish bone Sea Glass.  Split the waxed linen so that there are 2 strands on the right side of the sea glass bead, the inner most strand going through the hole, and the fourth strand on the left side of the bead.  (See the photo).  Now, form and tie an overhand knot down onto the bead.


Here's a picture of the overhand knot loosely formed in the linen.  You can see here how I've configured the strands of linen around this bead. 

I've tightened the knot down onto the bead.  

Now, add your next smaller piece of sea glass.  Except this time flip the two strands of the waxed linen to the left side of the bead.  


In this photo, I've configured the two pieces to the left side of the sea glass, the inner most strand is going through the bead, and the single strand of linen is on the right side of the bead this time.  Form your overhand knot and tighten it down.


We're adding the last sea glass bead! This time, the two strands of linen will be on the right, inner most through the hole, and single on the left.  Form your overhand knot and tighten it.  

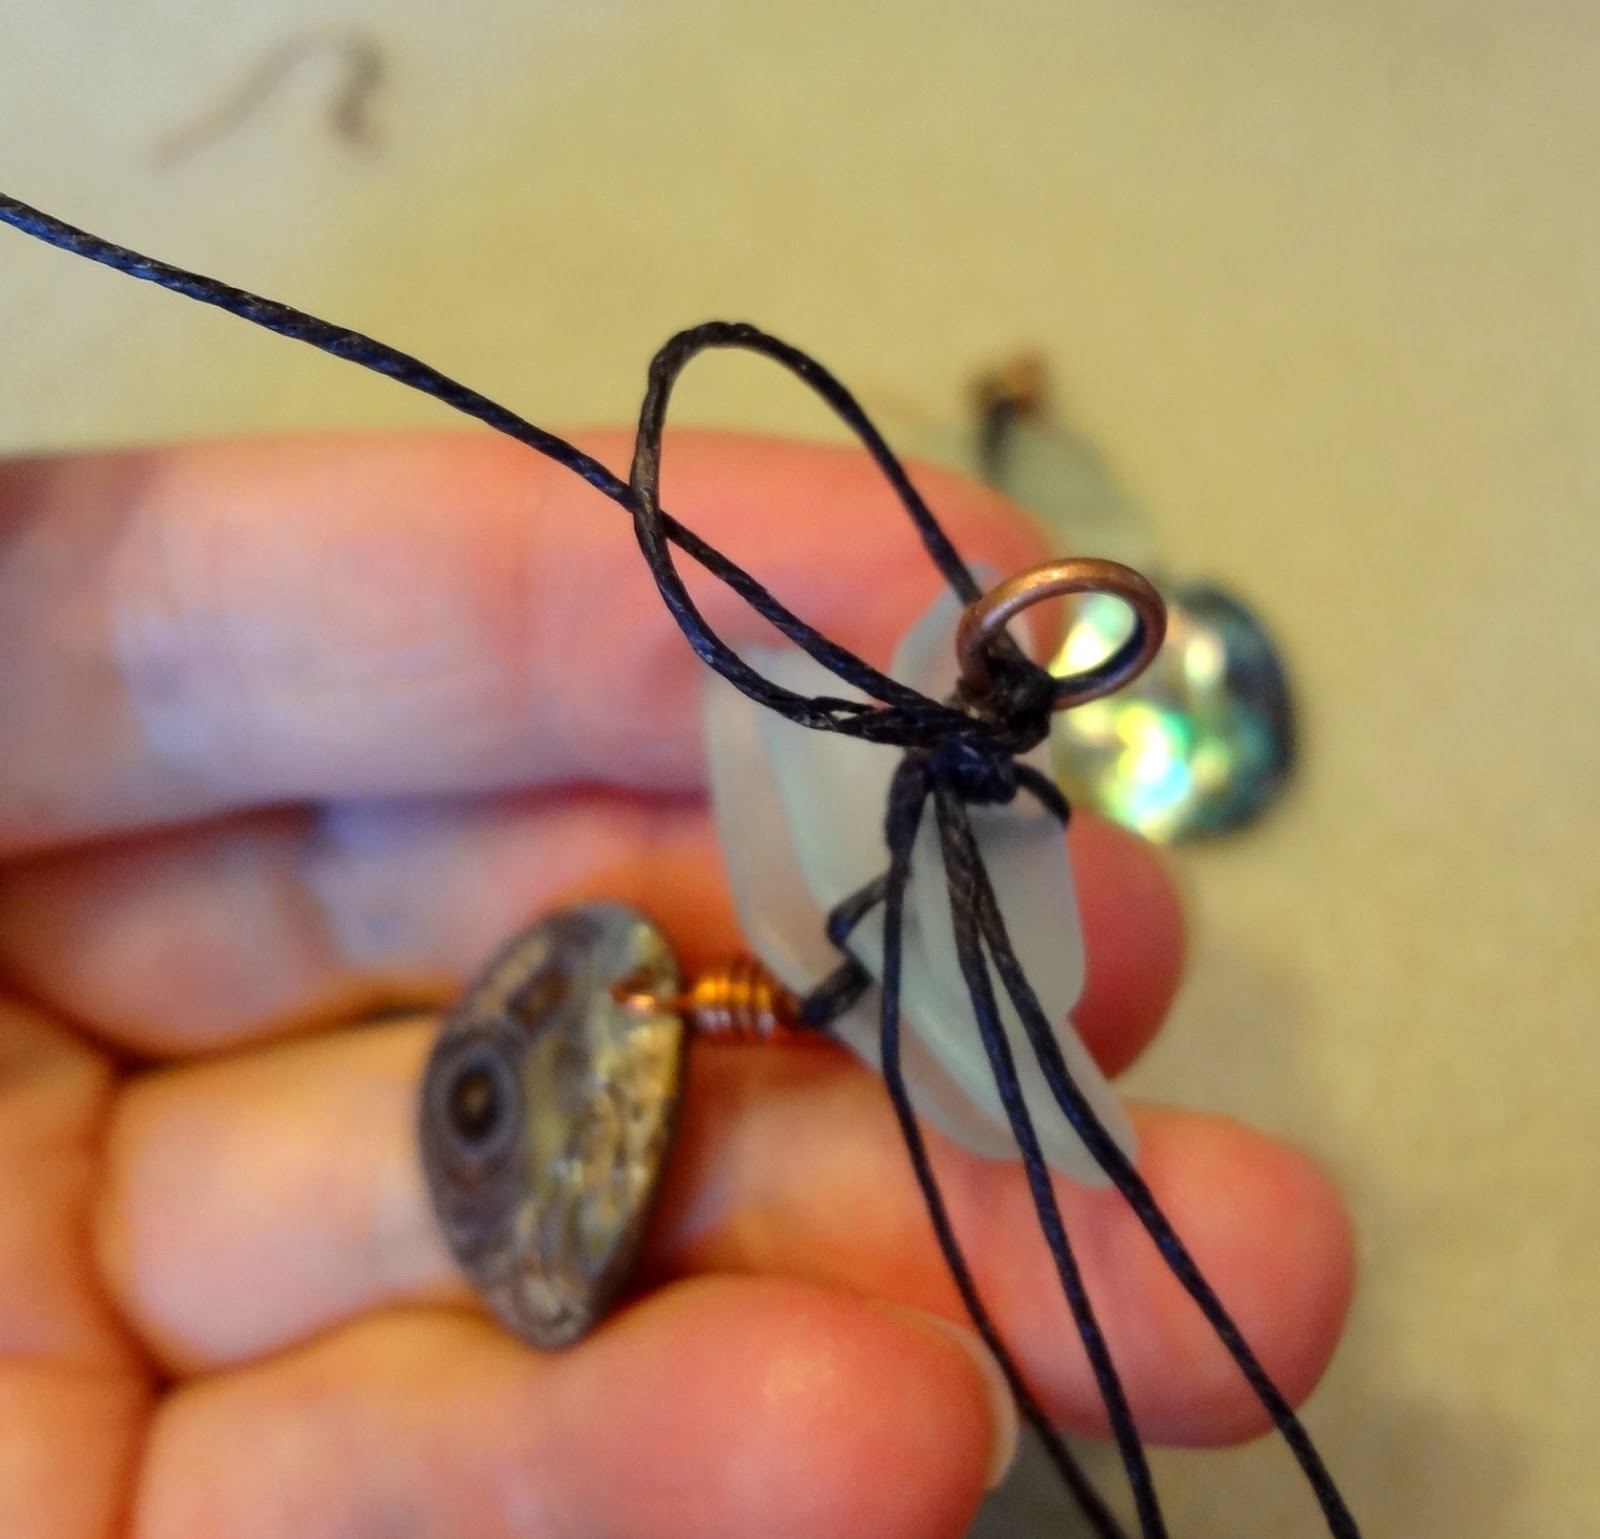
It's time to knot on the closed jump ring so that we can add our earring finding.  Almost done!


I'm going to leave the photos for this section a little larger.  Detail can sometimes be everything here!  

Pass 3 of the waxed linen strands through the jump ring, but leave the 4th strand off at a right angle.


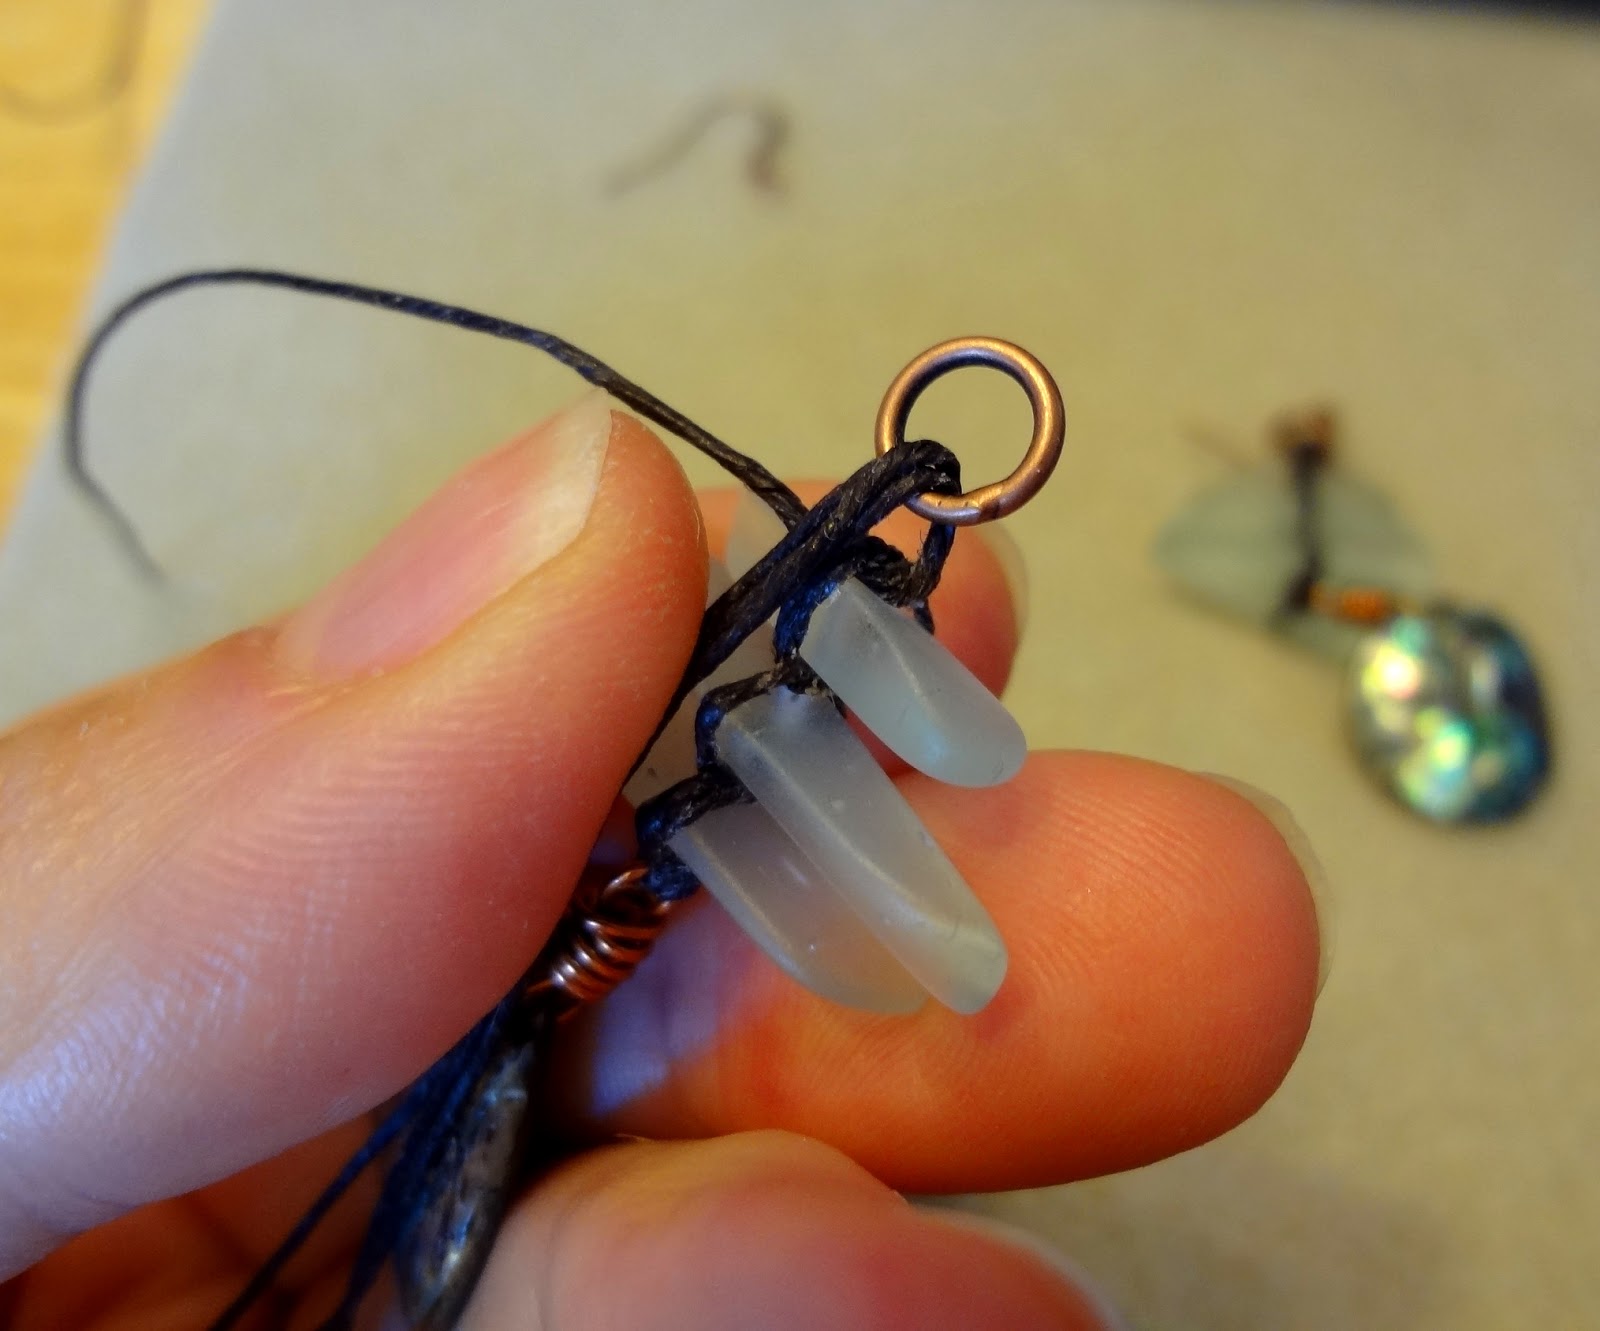
Fold the 3 strands down over the earring (as in the photo) and put your thumb on top of them.  You're going to use the strand you left out to create an overhand knot around the 3 strands capturing them and the jump ring. 


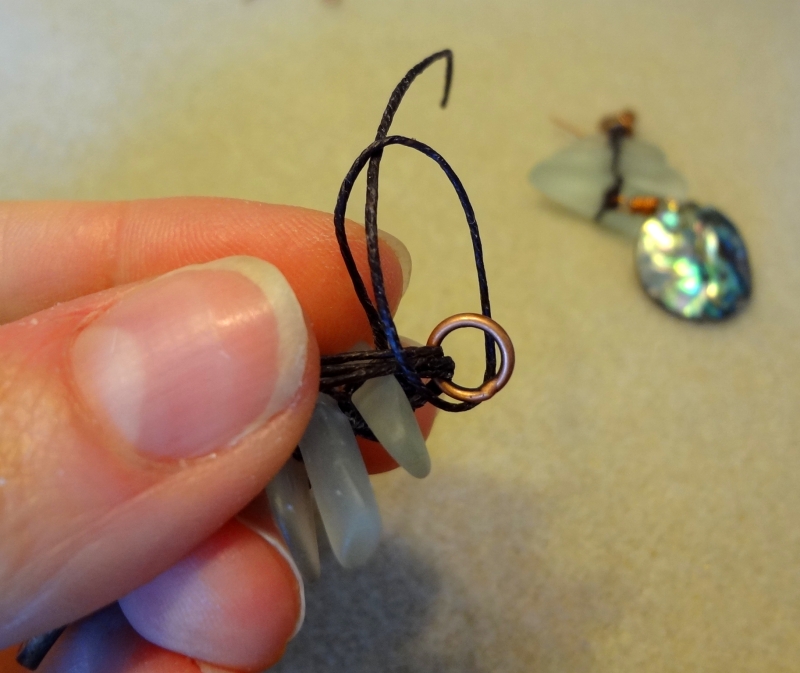
Hopefully you can see how I've formed the overhand knot around my base of all the other linen strands.  I'm going to tie 3 or 4 overhand knots around this base to finish this part of the earring. 


Here, I've created several knots around the base and I'm getting ready to tie my final knot.  Once I've tightened the knot, I'll cut it off close to the base.  Then roll it all between your fingers to warm the wax and melt all the loose pieces together.  


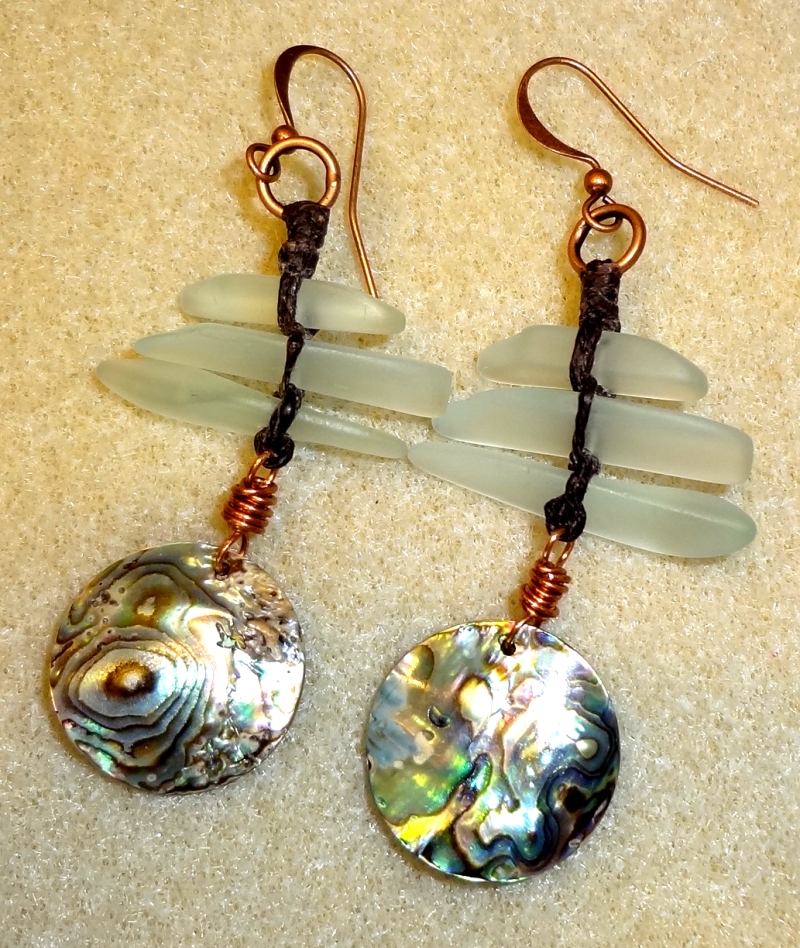
Now, you will add the earring finding and you're done. 


Tips about working with waxed linen:
  • Try to use Irish Waxed Linen - it's made with more wax and a much higher quality linen.  It holds up better and working with it will not pull the wax out of the strand onto your hand.  The cheaper waxed linen bleeds wax until the linen looks frayed and unwaxed.
  • Got a loose end to work in after a knot, just roll it between your fingers and watch it disappear.
  • Never make a knot in a place you don't want it to stay.  It's nearly impossible to remove a misplaced knot and doing so will fray the linen.  
  • If you are not as comfortable working with waxed linen, use a beading awl to place your knots before you tighten them.  The awl allows you to get the knot exactly where you want it before it tightens.
Looking for a quality waxed linen?  I sell it!  You can contact me for the choice of many colors and ply's (ply refers to how many strands are twisted into the linen cord - there is 2-ply, 3-ply, 4-ply, and 7-ply).  

4-Ply 10 Yard Spools (Not Irish Waxed, but pretty good quality):
Black, Dark Brown, White                                                        - $1.99/spool
 
Irish Waxed Linen:
2-Ply (Black, Natural White, Med. Brown)                          - $1.99/10 yards
 
3-Ply (Black, Med. Brown, Lt. Brown, Dk. Brown, Rust,
           Ruby Red, Emerald Green, Lavender, Maroon,
           Natural White, Olive Green, Plum, Royal Blue,
           Sage, Salmon, Teal, Turquoise, White)                   - $2.05/10 yards
 
4-Ply (Black, Med. Brown, Lt. Brown, Bright Yellow,
           Charcoal, Ruby Red, Dk. Brown, Denim Blue,
           Emerald Green, Rust, Forest Green, Fuchsia,
           Lavender, Rose Pink, Rust, Bright Yellow,
           Magenta, Mint Green, Maroon, Natural White,
           Navy Blue, Olive, Plum, Royal Blue, Robin Egg Blue,
           Victorian Rose, Salmon, Sage, Slate Gray, 
           Teal, Turquoise, Williamsburg Blue, White,
           Country Yellow)                                                      - $2.50/10 yards
 
7-Play (Black only)                                                             - $3.75/10 yards


Need shell, sea glass, gemstone, findings or any other materials or tools mentioned in this blog - we sell that too!  Just contact me for prices or check out my Etsy Store: DragonflyBeadsStudio

Tuesday, March 17, 2015

Keep It Simple Stupid!

K.I.S.S.


Ever feel like a project just isn't worth doing unless it takes 40 hours - endless cursing - and techniques so complex they don't make sense anymore?!  If you've just started beading....Beware!  The monster of complexity looms on the horizon.  

I've been teaching beading - all manners of - for over 12 years now and I know this scenario well.  It begins simply enough: you've been taught how to do something simple by your beloved local bead store (because if you're shopping at a big box store - shame on you), and off you go tra-la-la-ing merrily learning to bead!  This is good for the next few months.  Year.  Maybe two years.  Then, all of a sudden, it's not enough!!

What?  Wait, a minute.  What just happened?!  I'll tell you what happened.  You've mastered the basics and moved on.  Then, LOW AND BEHOLD you've gotten addicted to your new hobby....and, yep, beads do that!  They have this way of insidiously seeping into our every waking (and no so wakeful) thoughts forcing us to devise new ways to use them. 

All of us old timers will tell you that that addiction is tough to put away.  That addiction leads us in to ever-evolving and complex beading projects because our minds are fascinated with the act of beading.  At this point, resistance is futile!  Those one hour projects have, hopelessly, turned into 3, 4, 10, 40 hour projects.  40 hours?!!  

You know what?!  You can't readily sell a project what has taken 40 hours to create.  It's your baby, you sure you want to sell it anyway?  Trust me when I say, the higher the price point, the longer it takes to sell.  And, I'm here to remind you of one more thing.....Keep It Simple Stupid!  

Why, you ask, should I back track now just when I've hit my stride?!  Well, a couple of things.  To remind you that (1) simple sells, and (2) simple cleans and refreshes your mind.  Like sleep clears your thoughts, so will doing a simple project from time to time.  It allows your mind to relax.  With that thought in mind, let's play with our beads! 

Recently, I played with some pearls - well mostly because my mom came to me with a friend's repair which involved some pearls - but, I had them out and I thought: "God, I love pearls!"  So, here is something simple to consider and maybe create - just for you from me.  

Why not, right?!

The Simple Pearl Project

Supplies:
11 - 8mm Freshwater Pearls
13-15 Inches - 3mm SP Curb Chain
10 - 4mm SP Jump Rings 
5 - 5mm SP Jump Rings
7 - 1.5" GP Bead Tip Headpin
15 - 3mm GP Faceted Nuggets
1 - 9mm SP Lobster Claw
1 pair of SP French Ear wires
1 - 8" piece of 22 g SP wire
1 Tiny Cute Charm


Prepare the components before assembling:
1.  Cut 4 - 2" pieces of chain

2.  Cut 2 - 2.75" pieces of chain

3.  Cut 1 - 1/2" piece of chain

4.  Headpin 7 pearls with a gold nugget and top loop onto a GP bead tip headpin (charmed pearls)

5.  Wire 4 pearls with gold nuggets and loops on either side onto the 22g SP wire (double looped pearls)

6.  Lay out your components in the order they will be assembled on a bead pad.


Assembling the Necklace:
7.  Open the top loops on the charmed pearls and ring them onto the 1/2" length of chain (see left) in the pattern you see:  one pearl on the end and two each on the next link up, skip a link, then again on the next link up
 
8.  With a 5mm jump ring, ring the cluster of pearls to two lengths of 2" chain


9.  With 4mm jump rings, ring a double-looped pearl onto the end of each of the 2" pieces of chain

10.  With a 4mm jump ring, ring a length of 2.75" chain to the end of each double looped pearl (see left)


11. In this order finish the chain as follows: jump ring the last two double looped pearls to the 2.75" chain, then jump ring the last two 2" lengths of chain to those pearls.  

12.  Finish the necklace with a 5mm jump ring on one side and a 4mm jump ring and the lobster claw on the other.  

13.  Add the tiny cute charm next to the lobster claw


Earring Assembly:
1. With a 5mm jump ring, ring a charmed pearl to the french ear wire.  Voila!


You should have a nice pearl necklace and earring set!  Yay!  

Now, go outside and play with your kids.


Happy Beading!!


Wanting to know more?  You can get more detailed directions and full color photos of my projects at my Etsy store - Dragonfly Beads Studio - as a downloadable PDF.    

You can also get all or most of the supplies you see in my projects from me at my Etsy Store - Dragonfly Beads Studio - or like me on Facebook at Dragonfly Beads!! You can send me messages on either link for supplies you can't find online - the findings, wire, clasping, gemstone, pearls, seed beads - I carry it all!  Just ask!